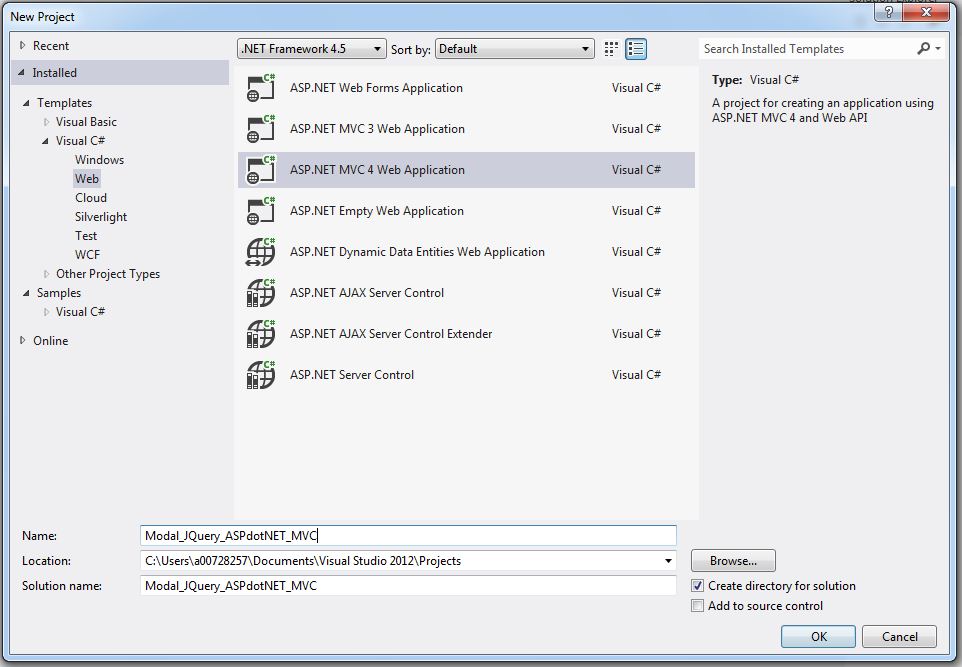
Create a project, name it "ExportToExcelSendEmailandRecaptcha"

After you add the project Select "MVC" project and click "Ok"

You will see the following solution is added
 Add a ViewModel Folder and right click and add class. As class as "Instructor.cs"

After this define the model, please remember for this demo the model is not important so I am not going to database and creating the model. I will only be using this viewModel as my model.
Add the following code in "Instructor.cs"
This should give us the normal kind of view whenever we open an index view, but for that you need to right click on the action and click view. Let's make the view linked to the viewmodel we had created for making it easy to implement.


Now click run and this is the page you should see

Now add the Export to excel button to the view, write the following code in the view:

Now your view should look like this.

Now let's implement the export to excel button. In the controller add the following code.
In the action definition add

Now add the reuse object with the following code, please also note the reference added
Now you are ready, click on the button and you should be asked to save the excel sheet.

You can save the excel sheet and you will see that you have the same table as in index

Now let's move to the other section for sending Email using hotmail (Now Outlook) using your code. The idea is the administrator will get email when comment will be updated by anyone in the website.
First in the Reuse.cs add the following reference
anyAlias highlighted in orange is the display name with which the email will be sent. Now in the HomeController add the contact function
Now create another ViewModel as follows and name it ContactWithEmail.cs. I am creating this ViewModel even for one single component in the page to show that we can have components exported in email and also to make it easier for Captcha implementation, which I will talk about later.
now build the code to add strongly typed view with the ViewModel. Select the following options:

With this an edit form will be generate called Contact.cshtml. In the generated code you will see @Html.EditorFor. Please change that to @Html.TextAreaFor. The code will look like the following now
Now let's create the post action for contact with the following code
Please try to put a comment and send message now to see it will work :)
Now let's move to captcha implementation, we don't want bots saving comments do we. For this we need to go to NuGet and get ReCaptcha plugin. Open NuGet and search for ReCaptcha as below:

Click on install and follow through. Now add the following to the reference in HomeController.cs
Then make the following changes to the Web.config file that is on the outermost solution
In the contact.cshtml make the following changes (highlighted in yellow)
Your contact.cshtml should now look like this

Now let's implement the final code for checking the captcha. This will change the post action method for contact in the HomeController.cs
This is the final implementation. I couldn't find a way to upload my code, if you need, please contact me I will be happy to share. However, I have also pasted all my code below, please don't forget to add NuGet reference for recaptcha.
Final Codes:
HomeController.cs
After you add the project Select "MVC" project and click "Ok"
You will see the following solution is added
After this define the model, please remember for this demo the model is not important so I am not going to database and creating the model. I will only be using this viewModel as my model.
Add the following code in "Instructor.cs"
using System;
using System.Collections.Generic;
using System.Linq;
using System.Web;

namespace ExportToExcelSendEmailandRecaptcha.ViewModel
{
   public class Instructor
   {
     public string FirstName { get; set; }
     public string LastName { get; set; }
     public string Email { get; set; }
     public string Mobile { get; set; }
   }
}
public ActionResult Index()
{

    var instructors = new List<Instructor>
    {
     new Instructor{FirstName="Carson", LastName = "Alexander", Email="carson.alexander@xyz.com", Mobile="8888888888"},
     new Instructor{FirstName="Meredith", LastName = "Alonso", Email="carson.alexander@xyz.com", Mobile="8888888888"},
     new Instructor{FirstName="Arturo", LastName = "Anand", Email="carson.alexander@xyz.com", Mobile="8888888888"},
    new Instructor{FirstName="Gytis", LastName = "Barzdukas", Email="carson.alexander@xyz.com", Mobile="8888888888"},
   new Instructor{FirstName="Yan", LastName = "Li", Email="carson.alexander@xyz.com", Mobile="8888888888"},
   new Instructor{FirstName="Peggy", LastName = "Justice", Email="carson.alexander@xyz.com", Mobile="8888888888"},
   new Instructor{FirstName="Laura", LastName = "Norman", Email="carson.alexander@xyz.com", Mobile="8888888888"},
   new Instructor{FirstName="Nino", LastName = "Olivetto", Email="carson.alexander@xyz.com", Mobile="8888888888"}
    };
   TempData["instructors"] = instructors;
   return View(instructors);
}
This should give us the normal kind of view whenever we open an index view, but for that you need to right click on the action and click view. Let's make the view linked to the viewmodel we had created for making it easy to implement.
Now add the Export to excel button to the view, write the following code in the view:
Now let's implement the export to excel button. In the controller add the following code.
In the action definition add
Now add the reuse object with the following code, please also note the reference added
using System;
using System.Collections.Generic;
using System.Linq;
using System.Web;
using ExportToExcelSendEmailandRecaptcha.ViewModel;
using System.Web.UI;
using System.Web.UI.WebControls;
using System.IO;

namespace ExportToExcelSendEmailandRecaptcha.Reuse
{
    public class Reuse
    {
        internal void actualExport(List<Instructor> instructors, HttpResponseBase resp)
        {
            GridView gv = new GridView();
            gv.DataSource = instructors;
            gv.DataBind();
            resp.ClearContent();
            resp.Buffer = true;
            resp.AddHeader("content-disposition", "attachment; filename=" + "instructor" + ".xls");
            resp.ContentType = "application/msexcel";
            resp.Charset = "";
            StringWriter sw = new StringWriter();
            HtmlTextWriter htw = new HtmlTextWriter(sw);
            gv.RenderControl(htw);
            resp.Output.Write(sw.ToString());
            resp.Flush();
            resp.End();
        }
    }
}
Now you are ready, click on the button and you should be asked to save the excel sheet.
You can save the excel sheet and you will see that you have the same table as in index
Now let's move to the other section for sending Email using hotmail (Now Outlook) using your code. The idea is the administrator will get email when comment will be updated by anyone in the website.
First in the Reuse.cs add the following reference
using System.Net;
using System.Net.Mail;

//Then add this code below the actualExport function:


internal bool sendEmail(string strReceiver, string strSubject, string strComment)
{
       try
       {
                MailMessage mailMessage = new MailMessage();
                mailMessage.From = new MailAddress("defAdminEmail@hotmail.com", "anyAlias");
                mailMessage.To.Add(strReceiver);
                mailMessage.Subject = strSubject;
                mailMessage.Body = strComment;
                mailMessage.IsBodyHtml = true;

                SmtpClient smtpClient = new SmtpClient();
                smtpClient.Host = "smtp-mail.outlook.com";
                smtpClient.Port = 587;
                smtpClient.EnableSsl = true;

                NetworkCredential networkCredential = new NetworkCredential();
                networkCredential.UserName = "abc@hotmail.com";
                networkCredential.Password = "abcde";
                smtpClient.UseDefaultCredentials = true;
                smtpClient.Credentials = networkCredential;

                smtpClient.Send(mailMessage);
                return true;
         }
         catch (Exception e)
         {
                return false;
          }
 }
anyAlias highlighted in orange is the display name with which the email will be sent. Now in the HomeController add the contact function
public ActionResult Contact()
{
    ViewBag.Message = TempData["submitMessage"];
    return View();
}
Now create another ViewModel as follows and name it ContactWithEmail.cs. I am creating this ViewModel even for one single component in the page to show that we can have components exported in email and also to make it easier for Captcha implementation, which I will talk about later.
using System;
using System.Collections.Generic;
using System.Linq;
using System.Web;
using System.ComponentModel.DataAnnotations;

namespace ContosoUniversity.ViewModels
{
    public class ContactWithEmail
    {
        [Required(ErrorMessage = "Please enter Comment")]
        public string Comment { get; set; }
    }
}
now build the code to add strongly typed view with the ViewModel. Select the following options:
With this an edit form will be generate called Contact.cshtml. In the generated code you will see @Html.EditorFor. Please change that to @Html.TextAreaFor. The code will look like the following now
@model ExportToExcelSendEmailandRecaptcha.ViewModel.ContactWithEmail
@{
    ViewBag.Title = "Contact";
}

<h2>Contact</h2>
@using (Html.BeginForm())
{
    @Html.AntiForgeryToken()

    <div class="form-horizontal">
        <h4>ContactWithEmail</h4>
        <hr />
        @Html.ValidationSummary(true, "", new { @class = "text-danger" })
        @ViewBag.Message
        <div class="form-group">
        @Html.LabelFor(model => model.Comment, htmlAttributes: new { @class = "control-label col-md-2" })
        @Html.TextAreaFor(model => model.Comment, new { htmlAttributes = new { @class = "form-control" }, rows="5", cols="50" })
        @Html.ValidationMessageFor(model => model.Comment, "", new { @class = "text-danger" })
    </div>

        <div class="form-group">
            <div class="col-md-offset-2 col-md-10">
                <input type="submit" value="Save" class="btn btn-default" />
            </div>
        </div>
    </div>

}

<div>
    @Html.ActionLink("Back to List", "Index")
</div>
Now let's create the post action for contact with the following code
[HttpPost]
public ActionResult Contact(ContactWithEmail contact)
{
     if (ModelState.IsValid)
      {
           if (ReUse.sendEmail("abc@hotmail.com", "From Website", contact.Comment))
           {
               TempData["submitMessage"] = "You have successfully submitted your message, you will be contacted shortly";
               return RedirectToAction("contact");
           }
           else
           {
               TempData["submitMessage"] = "Sorry currently your email couldn't be sent";
                return RedirectToAction("contact");
            }
        }
       return View(contact);
}
Please try to put a comment and send message now to see it will work :)
Now let's move to captcha implementation, we don't want bots saving comments do we. For this we need to go to NuGet and get ReCaptcha plugin. Open NuGet and search for ReCaptcha as below:
Click on install and follow through. Now add the following to the reference in HomeController.cs
using Recaptcha.Web;
using Recaptcha.Web.Mvc;
using System.Threading.Tasks;
Then make the following changes to the Web.config file that is on the outermost solution
<appSettings>
    <add key="webpages:Version" value="3.0.0.0" />
    <add key="webpages:Enabled" value="false" />
    <add key="ClientValidationEnabled" value="true" />
    <add key="UnobtrusiveJavaScriptEnabled" value="true" />
    <add key="recaptchaPublicKey" value="6LcYP-YSAAAAAG4Pir8LWAtarfN7ZfEaGgJ9H7Gv" />
    <add key="recaptchaPrivateKey" value="6LcYP-YSAAAAAHq5pXcy5_PB7nY-AB-P-4hVG9rO" />
</appSettings>
In the contact.cshtml make the following changes (highlighted in yellow)
@model ExportToExcelSendEmailandRecaptcha.ViewModel.ContactWithEmail
@using Recaptcha.Web.Mvc;
@{
    ViewBag.Title = "Contact";
}

<h2>Contact</h2>

@using (Html.BeginForm())
{
    @Html.AntiForgeryToken()

    <div class="form-horizontal">
        <h4>ContactWithEmail</h4>
        <hr />
        @Html.ValidationSummary(true, "", new { @class = "text-danger" })
        @ViewBag.Message
        <div class="form-group">
        @Html.LabelFor(model => model.Comment, htmlAttributes: new { @class = "control-label col-md-2" })
        @Html.TextAreaFor(model => model.Comment, new { htmlAttributes = new { @class = "form-control" }, rows="5", cols="50" })
        @Html.ValidationMessageFor(model => model.Comment, "", new { @class = "text-danger" })
    </div>
        <div class="form-group">
            @Html.Label("   ", new { @class = "col-sm-2 control-label" })
            @Html.Recaptcha(theme: Recaptcha.Web.RecaptchaTheme.Clean)
        </div>
        <div class="form-group">
           <div class="col-md-offset-2 col-md-10">
                <input type="submit" value="Save" class="btn btn-default" />
            </div>
        </div>
    </div>
}


<div>

    @Html.ActionLink("Back to List", "Index")

</div>
Your contact.cshtml should now look like this
Now let's implement the final code for checking the captcha. This will change the post action method for contact in the HomeController.cs
[HttpPost]
public async Task<ActionResult> Contact(ContactWithEmail contact)
{
     RecaptchaVerificationHelper recaptchaHelper = this.GetRecaptchaVerificationHelper();

     if (string.IsNullOrEmpty(recaptchaHelper.Response))
     {
         ModelState.AddModelError("", "Captcha answer cannot be empty");
         return View(contact);
     }
     RecaptchaVerificationResult recaptchaResult = await recaptchaHelper.VerifyRecaptchaResponseTaskAsync();
     if (recaptchaResult != RecaptchaVerificationResult.Success)
    {
        ModelState.AddModelError("", "Incorrect captcha error");
    }


    if (ModelState.IsValid)
    {
        if (ReUse.sendEmail("abc@hotmail.com", "From Website", contact.Comment))
        {
           TempData["submitMessage"] = "You have successfully submitted your message, you will be contacted shortly";
            return RedirectToAction("contact");
        }
        else
       {
            TempData["submitMessage"] = "Sorry currently your email couldn't be sent";
            return RedirectToAction("contact");
        }
    }
    return View(contact);
}
This is the final implementation. I couldn't find a way to upload my code, if you need, please contact me I will be happy to share. However, I have also pasted all my code below, please don't forget to add NuGet reference for recaptcha.
Final Codes:
HomeController.cs
using System;
using System.Collections.Generic;
using System.Linq;
using System.Web;
using System.Web.Mvc;
using ExportToExcelSendEmailandRecaptcha.ViewModel;
using System.Collections;
using ExportToExcelSendEmailandRecaptcha.Reuse;
using Recaptcha.Web;
using Recaptcha.Web.Mvc;
using System.Threading.Tasks;

namespace ExportToExcelSendEmailandRecaptcha.Controllers
{
    public class HomeController : Controller
    {
        Reuse.Reuse ReUse = new Reuse.Reuse();

        public ActionResult Index(bool? toExport=false)
        {
            var instructors = new List<Instructor>
            {
                new Instructor{FirstName="Carson", LastName = "Alexander", Email="carson.alexander@xyz.com", Mobile="8888888888"},
                new Instructor{FirstName="Meredith", LastName = "Alonso", Email="carson.alexander@xyz.com", Mobile="8888888888"},
                new Instructor{FirstName="Arturo", LastName = "Anand", Email="carson.alexander@xyz.com", Mobile="8888888888"},
                new Instructor{FirstName="Gytis", LastName = "Barzdukas", Email="carson.alexander@xyz.com", Mobile="8888888888"},
                new Instructor{FirstName="Yan", LastName = "Li", Email="carson.alexander@xyz.com", Mobile="8888888888"},
                new Instructor{FirstName="Peggy", LastName = "Justice", Email="carson.alexander@xyz.com", Mobile="8888888888"},
                new Instructor{FirstName="Laura", LastName = "Norman", Email="carson.alexander@xyz.com", Mobile="8888888888"},
                new Instructor{FirstName="Nino", LastName = "Olivetto", Email="carson.alexander@xyz.com", Mobile="8888888888"}
            };

            //Not for first time load, will be triggered only when you click on export to excel
            if (toExport == true)
            {
                ReUse.actualExport(instructors.ToList(),this.Response);
            }
            return View(instructors);
        }

        public ActionResult Contact()
        {
            //For error or success message display when redirected
            ViewBag.Message = TempData["submitMessage"];
            return View();
        }

        [HttpPost]
        public async Task<ActionResult> Contact(ContactWithEmail contact)
        {
            RecaptchaVerificationHelper recaptchaHelper = this.GetRecaptchaVerificationHelper();

            if (string.IsNullOrEmpty(recaptchaHelper.Response))
            {
                ModelState.AddModelError("", "Captcha answer cannot be empty");
                return View(contact);
            }
            RecaptchaVerificationResult recaptchaResult = await recaptchaHelper.VerifyRecaptchaResponseTaskAsync();

            if (recaptchaResult != RecaptchaVerificationResult.Success)
            {
                ModelState.AddModelError("", "Incorrect captcha error");
            }

            if (ModelState.IsValid)
            {
                if (ReUse.sendEmail("abc@hotmail.com", "From Website", contact.Comment))
                {
                    TempData["submitMessage"] = "You have successfully submitted your message, you will be contacted shortly";
                    return RedirectToAction("contact");
                }
                else
                {
                    TempData["submitMessage"] = "Sorry currently your email couldn't be sent";
                    return RedirectToAction("contact");
                }

            }
            return View(contact);
        }
    }
}
Index.cshtml
@model IEnumerable<ExportToExcelSendEmailandRecaptcha.ViewModel.Instructor>

@{
    ViewBag.Title = "Index";
}

<h2>Index</h2>
@using (Html.BeginForm("Index","Home",FormMethod.Get))
{
    @Html.Hidden("toExport",true)
    <input type="submit" class="btn btn-danger" value="Export to Excel" />
}


<p>

</p>
<table class="table">
    <tr>
        <th>
            @Html.DisplayNameFor(model => model.FirstName)
        </th>
        <th>
            @Html.DisplayNameFor(model => model.LastName)
        </th>
        <th>
            @Html.DisplayNameFor(model => model.Email)
        </th>
        <th>
            @Html.DisplayNameFor(model => model.Mobile)
        </th>
        <th></th>
    </tr>

@foreach (var item in Model) {
    <tr>
        <td>
            @Html.DisplayFor(modelItem => item.FirstName)
        </td>
        <td>
            @Html.DisplayFor(modelItem => item.LastName)
        </td>
        <td>
            @Html.DisplayFor(modelItem => item.Email)
        </td>
        <td>
            @Html.DisplayFor(modelItem => item.Mobile)
        </td>
        <td>
            @Html.ActionLink("Edit", "Edit", new { /* id=item.PrimaryKey */ }) |
            @Html.ActionLink("Details", "Details", new { /* id=item.PrimaryKey */ }) |
            @Html.ActionLink("Delete", "Delete", new { /* id=item.PrimaryKey */ })
        </td>
    </tr>
}

</table>
Reuse.cs
using System;
using System.Collections.Generic;
using System.Linq;
using System.Web;
using ExportToExcelSendEmailandRecaptcha.ViewModel;
using System.Web.UI;
using System.Web.UI.WebControls;
using System.IO;
using System.Net;
using System.Net.Mail;

namespace ExportToExcelSendEmailandRecaptcha.Reuse
{
    public class Reuse
    {
        internal void actualExport(List<Instructor> instructors, HttpResponseBase resp)
        {
            //We will use grid to put the same in excel by creating XML which will be saved as excel
            //create new grid handle
            GridView gv = new GridView();
            //assign the instructor table as datasource
            gv.DataSource = instructors;
            //bind the data source with the grid handle
            gv.DataBind();
            resp.ClearContent();
            resp.Buffer = true;
            //This gives the name of the excel sheet, inplace of "instructor" you can have different filename
            //If you want different file name you can have this also sent from the controller
            resp.AddHeader("content-disposition", "attachment; filename=" + "instructor" + ".xls");
            resp.ContentType = "application/msexcel";
            resp.Charset = "";
            StringWriter sw = new StringWriter();
            HtmlTextWriter htw = new HtmlTextWriter(sw);
            gv.RenderControl(htw);
            resp.Output.Write(sw.ToString());
            resp.Flush();
            resp.End();
        }

        internal bool sendEmail(string strReceiver, string strSubject, string strComment)
        {
            try
            {
                //create the mail message handle, this is given by System.Net.Mail
                MailMessage mailMessage = new MailMessage();
                //This gives the from address for sender
                //First is for the email address and second is for display name
                //Display name can be any but email has to be valid
                mailMessage.From = new MailAddress("abc@hotmail.com", "Contosso University");
                //Add email to be sent to address
                mailMessage.To.Add(strReceiver);
                //Subject for the email
                mailMessage.Subject = strSubject;
                //Body of the email
                mailMessage.Body = strComment;
                //type for email body here I have selected to be HTML
                mailMessage.IsBodyHtml = true;

                //Define smtp handle given by System.Net
                SmtpClient smtpClient = new SmtpClient();
                //Define host, this keeps changing, so check your setting for hotmail
                //Alternatively you can use your gmail also ask smtp server
                smtpClient.Host = "smtp-mail.outlook.com";
                smtpClient.Port = 587;
                smtpClient.EnableSsl = true;

                NetworkCredential networkCredential = new NetworkCredential();
                networkCredential.UserName = "abc@hotmail.com";
                networkCredential.Password = "abcabc";
                smtpClient.UseDefaultCredentials = true;
                smtpClient.Credentials = networkCredential;

                smtpClient.Send(mailMessage);
                return true;
            }
            catch (Exception e)
            {
                return false;
            }
        }
    }
}
ContactWithEmail.cs
using System;
using System.Collections.Generic;
using System.Linq;
using System.Web;
using System.ComponentModel.DataAnnotations;

namespace ExportToExcelSendEmailandRecaptcha.ViewModel
{
    public class ContactWithEmail
    {
        /*You need not necessary add this ViewModel if you have only one column*/
        [Required(ErrorMessage = "Please enter Comment")]
        public string Comment { get; set; }
    }
}
Contact.cshtml
@model ExportToExcelSendEmailandRecaptcha.ViewModel.ContactWithEmail

@*Recaptcha will work only with public and private key. Please register in website*@
@using Recaptcha.Web.Mvc;
@*Recaptcha will work only with public and private key. Please register in website*@


@{
    ViewBag.Title = "Contact";
}

<h2>Contact</h2>

@using (Html.BeginForm())
{
    @Html.AntiForgeryToken()

    <div class="form-horizontal">
        <h4>ContactWithEmail</h4>
        <hr />
        @Html.ValidationSummary(true, "", new { @class = "text-danger" })
        @ViewBag.Message
        <div class="form-group">
            @Html.LabelFor(model => model.Comment, htmlAttributes: new { @class = "control-label col-md-2" })
            @Html.TextAreaFor(model => model.Comment, new { htmlAttributes = new { @class = "form-control" }, rows="5", cols="50" })
            @Html.ValidationMessageFor(model => model.Comment, "", new { @class = "text-danger" })
        </div>
        <div class="form-group">
            @Html.Label("   ", new { @class = "col-sm-2 control-label" })
            @Html.Recaptcha(theme: Recaptcha.Web.RecaptchaTheme.Clean)
        </div>
        <div class="form-group">
            <div class="col-md-offset-2 col-md-10">
                <input type="submit" value="Save" class="btn btn-default" />
            </div>
        </div>
    </div>
}

<div>
    @Html.ActionLink("Back to List", "Index")
</div>